Tuesday, November 27, 2012

Pecan Pie Cheesecake

I have seen this recipe for Pecan Pie Cheesecake all over Pinterest. I knew I had to make it for Thanksgiving.  I mean who doesn't love Pecan Pie and Cheesecake?

The crust is made from crushed Vanilla Wafer, yummy!  I may use this as a crust for future pies.


I have never made a Pecan Pie so this process was all new to me.  I really thought there would be more Dark Karo Syrup in the mix.


I had made a Cheesecake earlier this year, but this recipe was different.  Using the brown sugar made the cake a darker color, and everyone kept asking me why the cake wasn't creamy white. I'm assuming the recipes calls for brown sugar to keep the similar molasses flavors in both the pie and cake.


Something to point out - Always wrap your spring form pans with foil!  I always have a little bit of filling that leaks out while baking.


The Pie/Cake was delicious.  I was afraid it would be too sweet, but it wasn't. The cheesecake wasn't very sweet, it was more tart which balanced well with the sweetness of the pecan pie. In my opinion the pie to cake ratio was low. Next time I will make more pie filling and less cheesecake so they are even.


The Pecan Pie Cheesecake didn't even last through the Thanksgiving weekend! I will definitively make this one again.

Pecan Pie Cheesecake

Crust:
1 ¾ cups vanilla wafer crumbs
¼ cup firmly packed brown sugar
⅓ cup butter, melted

Pecan Filling:
1 cup sugar
⅔ cup dark corn syrup
⅓ cup butter, melted
2 eggs
1 ½ cups chopped pecans
1 teaspoon vanilla extract

Cheesecake Filling:
3 (8-ounce) packages cream cheese, softened
1 ¼ cups firmly packed brown sugar
2 tablespoons all-purpose flour
4 eggs
⅔ cup heavy whipping cream
1 teaspoon vanilla extract


Crust:

Preheat oven to 350°. Combine wafer crumbs and brown sugar. Stir in melted butter. Press into bottom and up sides of a 9″ springform pan. Bake for 6 minutes. Set aside to cool.

Pecan Filling:

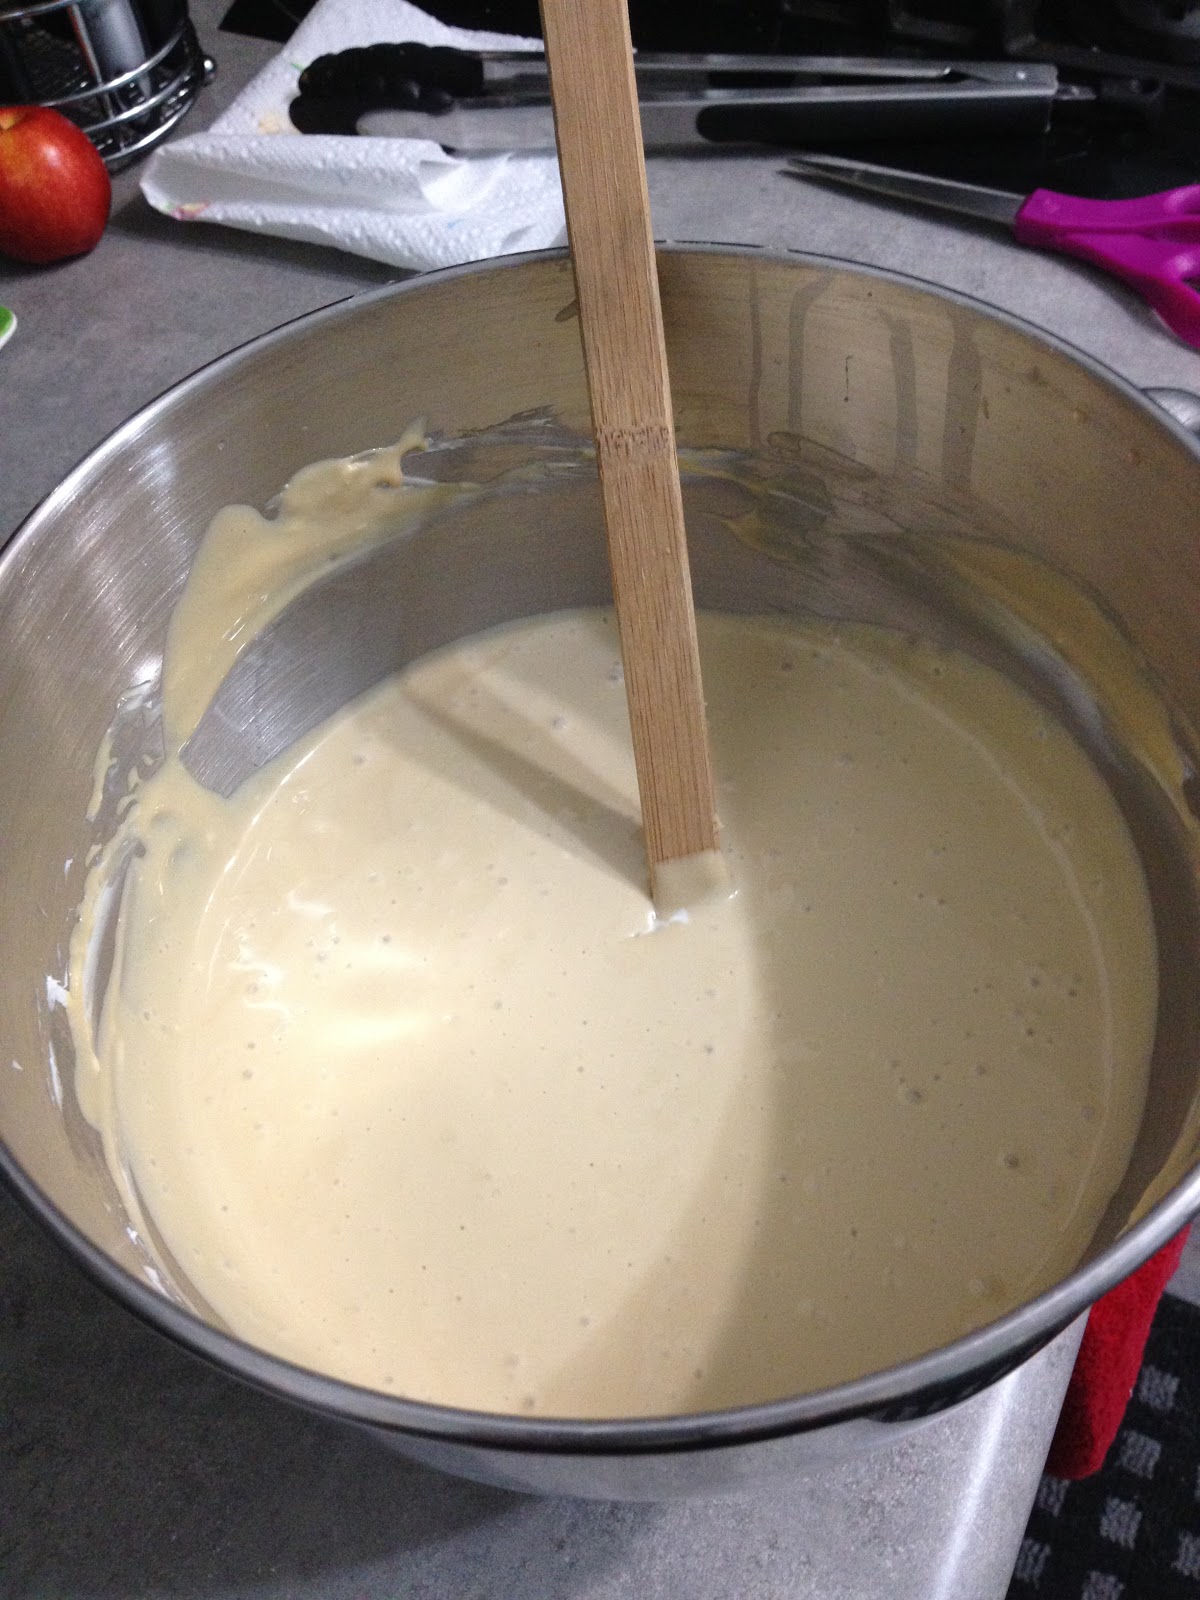
Combine all ingredients in a medium saucepan. Bring to a boil over medium-high heat. Reduce heat and simmer until thickened, about 8-10 minutes, stirring constantly. Pour into crust and set aside.

Cheesecake Filling:

Reduce oven to 325°. With a hand mixer or stand mixer, beat cream cheese at medium speed until creamy. Add brown sugar and flour and beat until fluffy. Add eggs one at a time, beating well after each one. Stir in cream and vanilla. Pour over pecan filling. Bake for 1 hour. Turn off oven and leave cheesecake in oven with the door closed for 1 hour. Remove from oven and run a knife along the outside edges to loosen cheesecake from sides of pan. Let cool. Chill for at least 4 hours before serving.

Friday, November 9, 2012

Hot Fudge Pie

I was looking for an easy chocolate dessert to make for a Football Party last weekend, and I found this recipe for Hot Fudge Pie.

After reading the blog and learning it was her grandma's recipe, I had high hopes it would be delicious! It also only had 7 ingredients, all of which I had on hand. And with Hot Fudge in the title, I was sold.  I could eat just hot fudge (no ice cream) and be a happy camper.

Ingredients
4 ounces unsalted butter
1 ½ squares unsweetened baking chocolate (1.5 ounces)
1 cup sugar
2 eggs, beaten
1 teaspoon vanilla extract
¼ cup all-purpose flour
2 tablespoons milk

Directions
  1. Pre-heat oven to 350 degrees.
  2. Butter an eight-inch diameter pie plate or cake pan – I used a 9 inch, which made my pie a little thinner.
  3. Melt butter and chocolate - I also used the microwave to do this, very easy.
  4. Mix sugar into beaten eggs, combine until sugar is fully incorporated.
  5. Mix in butter-chocolate mixture until completely blended.
  6. Add vanilla and milk. Stir well.
  7. Fold in flour, mixing just until no white streaks remain – do not overbeat.
  8. Bake for 25 minutes.
Pre Baking 
Out the Oven

I did have some trouble determining if it was done.  I knew it would have a fudgey texture so the toothpick trick wasn't going to help.  I let my pie bake a few extra minutes, and then let it cool.

We didn't eat the pie until hours later, so it wasn't all hot and gooey like the blog directed. I did warm it in the microwave before adding the ice cream.


This pie is amazing! The texture is fudgey and its so chocolaty!  I will definitively be making this again.  Grandmother Jessie - thank you for this recipe!    

Monday, November 5, 2012

Door Decor


A few months ago I stumbled upon this Door Initial idea on Pinterest - Door Initial Monogram Shabby Chic. I thought it was super cute, but I could easily make it for much less than $50.  

We started by choosing a font and making a template for the letter. Then we cut the letters out of plywood.


I painted a base coat of a dark brown.  Then I layered a barn red over it.  It look a few layers and mixes to achieve the antique look I was going for.  I found the best way was to paint the red and then use my fingers to blend in some browns for accent.

I picked up some fabric flowers, lace ribbon and wheat at my craft store to decorate the letters.

Here is my letter S and the inspiration Letter S.


I am pleased with how mine turned out (definitively shabby-chic), and it cost much less than $10.  
My door S is hanging in my kitchen now, since I have my fall wreath on my front door.


Thursday, November 1, 2012

Halloween Cookies

I randomly have Halloween cookie cutters.  So I decided to make some Halloween (Sugar-Free) Sugar Cookies. I found a great tasting recipe made with Splenda. - Sweet as Sugar Cookies.


I covered my counter top with wax paper to try to minimize the mess. 


This recipe makes over 3 dozen cookies!  I also found that I needed to bake them for 10-12 minutes to achieve the lightly browned edges.


Michael's decorated cookies! 
(The icing is not sugar free, but it makes you feel less guilty when the cookie is!)

I hope everyone had a Happy Halloween!


Monday, October 29, 2012

Corn and Cheese Chowder

The past weekend I decided to make Corn and Cheese Chowder. After watching Ree Drummond make it look uber easy on the Pioneer Woman, I thought it would be the perfect supper on a cold night.

So I chopped up my onion, bacon and peppers, and got them sauteing. Then added the corn.


After adding the flour, I added the chicken broth and milk (I never have half and half in my fridge.)


At this point you let the chowder simmer and thicken for 15 minutes.  My chowder never really thickened.  But I thought the cheese would help that out.  It didn't. My chowder was more like a corn soup. :(


I'm hoping that chowder, like gumbo, tastes better the next day.  Hopefully it will thicken and the flavors will meld.  

I'm not sure where I went wrong - I don't think the half and half would have made THAT big of a difference in thickening the chowder.  I also think I should have cooked and crisped the bacon separately then added it to the chowder - I've learned I'm not a fan of chewy bacon.

It was still a warm, filling dinner that was quick and easy to put together.

UPDATE:

After reheating and having for lunch today, the chowder was thicker.  It still seemed flat tasting tho.  I hadn't added any salt because it has bacon in it, but i decided to add a little.  It made a HUGE difference! 

Friday, October 12, 2012

Halloween Lanterns

I love Fall!  As soon as the weather gets cool, I am ready to decorate!

While looking at Pinterest to find ways to use my extra canning jars, I found this neat idea to make Halloween Lanterns. It also gave me a chance to cut vinyl with my Cricut.

I found a great site to order vinyl from - Expressions Vinyl.  They also have videos on how to "weed" and transfer vinyl so it was perfect for a beginner.

I used Martha Stewart's new glass paints to paint my 3 jars.  I baked them in the oven to set the paint.


I began by creating my Halloween design in Cricut Craft Room and cutting them out of Black Outdoor Vinyl.


I used transfer tape to apply the deigns to my jars -  This was so easy!


After removing the transfer tape, I had 3 beautiful Halloween Lanterns!


I used battery tea lights inside the jars so I could leave the lids on.  I may make handles to hang them on my porch for Halloween night!

Monday, August 13, 2012

Baked Doughnuts

This weekend I decided to try this recipe for Baked Donuts that I found on Pinterest.

I was pretty excited about the thought of a tasty, healthier alternative to doughnuts. A doughnut I wouldn't have to feel as guilty about eating.

The recipe called for simple ingredients that I already had on hand.

First I took a packet of active dry yeast and let it sit in the warm milk to activate.


Then I mixed the remaining ingredients and formed my dough.  I decided to use Splenda (instead of sugar), since I wanted these to be healthy. 


After letting the dough rise for an hour, it had gotten larger, but probably not 'double' in size.  But at this point I was so hungry I couldn't let it sit longer.  (Especially knowing that after I cut out the doughnuts they would have to rise for another 45 minutes!)


After rising for another 45 minutes, this is how big the donuts were.  (I just used a biscuit cutter since I didn't own a doughnut cutter, hence the no holes.)

After baking the doughnuts, they rose slightly but didn't really turn a golden brown, so I left them in the oven for a few additional minutes.

While they were baking I made the simple glaze for the doughnuts.


Finally, two hours later we were able to taste the doughnuts.  

The verdict?  Nothing can compare to a good old fashioned fried doughnut.  These were more like biscuits.  Overall, not too great.  My dad did suggest serving them with jelly because the texture and taste reminded him of a jelly doughnut.


Monday, August 6, 2012

Built in Dresser

While my master bedroom isn't small, it's on the 2nd floor and has slanted walls because of the roof.  This is problematic for furniture - if its too tall, it won't fit flush against the wall.  The slanted walls also create a lot of 'dead' space.  While some of the space was turned into attic storage, others were just left unused.

We saw this great idea to maximize the space and gain some much needed storage - A Built-in Dresser.

We started by cutting a hole into the wall - to see what was in there.


We quickly learned that there was No Insulation!  No wonder the 2nd floor was always so much hotter!  So we insulated the space and added plywood flooring. Then we framed the opening for support.  

Then my dad built the drawers.  He lined the outside of the box with cedar just in case there were any bugs lurking in the attic space.


Then we slid the drawer structure into the space, and it fit perfectly!

All that was left to do was 4 coats of paint! And here is the finished product.


The best part is now we have 3 more drawers of storage but it doesn't take away from the floor space!


Thursday, July 26, 2012

Bread Pudding

I also made Bread Pudding last weekend, that I learned how to make in my cooking class.  Bread pudding is fairly simple, I had most of the ingredients on hand and it turns into a tasty dessert.

The best thing about bread pudding is it a great use up for day old french bread. You can just keep the stale bread in the freezer until you have enough to make a batch.  I didn't have any stale bread so I just bought a loaf of po-boy bread, cut it up into pieces and let it get stale on the counter while I made the gumbo.


What I really liked about the recipe we learned in class was it uses a package of Vanilla Pudding mix.  Makes sense right? Bread PUDDING?  It definitively added to the moist texture.

Then I combined the milk, eggs etc and poured over the bread and pudding mix.  


I let this soak in for a good 10 minutes before transferring it to the baking dish.


I baked the bread pudding for 50+ minutes, and it turned a beautiful golden brown.


I made the breading pudding with Splenda instead of sugar so my dad (a diabetic) could enjoy some.  You definitively couldn't taste a difference.

We also learned how to make a Praline sauce, which was AMAZING!! There was no way to make this sugar free (Sorry Dad).


Monday, July 23, 2012

Seafood Gumbo

Last week I took a cooking class at Simplee Gourmet. In the class we learned some local Louisiana favorites - BBQ Shrimp, Seafood Gumbo, Chicken and Sausage Jambalya and Bread Pudding.

I was always too intimidated to try making these, knowing they would never taste like my Mom's and Grandma's.  I was surprised to see how easy they were to make!

So I decided to make a pot of gumbo for my family this past weekend.

One of the big things I learned in the class was to get EVERYTHING ready before you start cooking.  So I chopped up all my ingredients before I even turned on the stove.

Then I sauteed my okra to "rope" it - AKA to make it not snotty. I only did this for about 10 mintues, but next time I will continue to saute until all the "rope" is gone.


The next step was the most stressful, the Roux. Watching it done in the class, made it seem fairly easy, just keep stirring so it doesn't burn.


Within a few minutes it was at the Dark Chocolate stage and ready for the veggies, I don't have any pictures of this step because I was moving quickly so I wouldn't ruin the Roux.

Then I combined the roux and veggies with the homemade seafood stock (which I made from the shrimp peelings.)


I added the crabs and let the gumbo simmer for 40+ minutes.


Then 10 minutes before I was serving the gumbo, I added the peeled shrimp.


I served the gumbo with rice and french bread, and it was delicious.  It reminds me of my Grandma's gumbo.


Wednesday, July 11, 2012

Zucchini Boats

Since the garden has been producing loads of veggies, I've had to get creative with my recipes.

Average Daily Pickings


So with all the zucchini, I decided to try a stuffed zucchini boat recipe. 

I started by sauteing some onions and garlic in some EVOO.  I cut the zucchini's length wise, and scooped out the insides with a spoon.  I then added the zucchini insides to the saute pan.  

In a separate bowl I combined one package of fat free cream cheese, salt, pepper, and a little grated Pecorino Romano cheese.  Then I mixed in the sauteed onions, garlic and zucchini. 

At this point I realized I had more filling than zucchinis, so I decided to stuff some Anaheim peppers as well. I split the peppers on one side to remove the seeds and ribs.

Then I filled the zucchinis and Anaheim peppers with the cream cheesy goodness. 

I had some turkey bacon on hand, so I wrapped the peppers each with one piece of bacon to help keep them closed.

I baked them  at 400° on a cooling rack on top of a baking sheet for 15 minutes, until they were browned on top and the peppers were slightly charred. 


It was very delicious!  I've made these at least 3 times already! It's an easy and healthy way to eat your home grown veggies.


Monday, June 11, 2012

Zuchinni Bread

So what do you do when you find zuchinnis this big in your garden?


You make Zuchinni Bread of course!

I've never had zuchinni bread before, so I was a little hesitant about how it would taste.  But I looked up a Paula Dean Zuchinni Bread Recipe and I thought I'd give it a try.

The only bad part about zuchinni bread is that it only uses 2 cups of zuchinni, which isn't a lot when you have tons of zuchinni to use up.


So I grated about 3 zuchinni which gave me 4 cups. (I made 2 batches not knowing each batch made 2 loaves!)

The first batch's dough looked soupy, so for the second batch I wrung out the zuchinni to remove of some of the water.

I was pleasantly surprised when I tasted these muffins!  They were great! Like a super moist spice muffin.  


I've read you can even make a chocolate zuchinni cake!  I think I will definitively continue experimenting with zuchinni in my baking!