Monday, June 4, 2012

Porch Update

Remember that porch we built back in October? Well, I slipped and fell down the stairs on Saturday so we decided it was a good time to clean and paint it.

We had primed the porch back in the Winter.


I had already picked out the colors, we just hadn't found the time to paint it. We decided to add some Rust-Oleum anti slip additive into the paint that would be on the floor and stairs.


So here is a side by side by side.  
No Porch, Primed Porch, Newly Painted Porch.


I think its a huge improvement. Though now it makes the rest of the house look even worse. Eventually, the house will be a light grey blue with navy blue as accent and the sliver grey as a highlight. I've been living here for nearly 2 years, but some how adding my address numbers makes it feel more official.

Thursday, May 31, 2012

Cheesecake

Last weekend I made a delicious cheesecake from scratch. I had never made cheesecake before so I was a little apprehensive, but Michael requested this cheesecake and since we were celebrating the end of his spring semester with all A's, I decided to give it a try.

Giada de Laurentiis Honey Ricotta Cheesecake

The first thing I had to do was get a spring form pan!  And I soon realized that Walmart probably wouldn't have all the necessary ingredients, so I went to Fresh Market to get Biscotti, fresh Ricotta, Clover Honey and some Croissants (those were for breakfast the next day :)).

I also realized I needed a food processor so I thought this was a good excuse to finally buy one!

I'm so glad the recipe tells you to wrap the outside of your spring form pan with foil, because I noticed that my cheesecake mixture did leak out a little near the clasp on the pan.


Here is the Biscotti crust before it went into the oven, it didn't look much different after 15 minutes of baking.

In the middle of making the cheesecake, I learned I did not own a roasting pan large enough to fit my new spring form pan in.  So I had to rush over to my mom's house to borrow one!


I was a little confused if the cheesecake was supposed to bake at 350° aswell since the recipe didn't specify. But it turned out great after baking for probably 1 hour and 10 minutes!


The hardest part about this recipe is that you can't eat the cake for 8 hours! It has to chill in the refrigerator.


But it was worth the wait!  The cheesecake was amazing! Not super sweet, but smooth and creamy.  I plan on making this again, but tweaking the recipe with different flavors of Biscotti and maybe making a chocolate or caramel cream cheese filling.


Tuesday, May 29, 2012

Homemade Pickles

Our garden is doing very well this summer.  So good that we have so many cucumbers we didn't know what to do with them!


So I decided to make my own pickles! I figured it was better than letting all these cucumbers go bad.

I got some jars, pickling spices, and vinegar and researched some recipes. A lot of recipes called for boiling the jars, and needing tongs to take them out or having to wait weeks before you could enjoy your pickles.  I finally found an easy method that makes delicious pickles ready to eat in 24 hours.

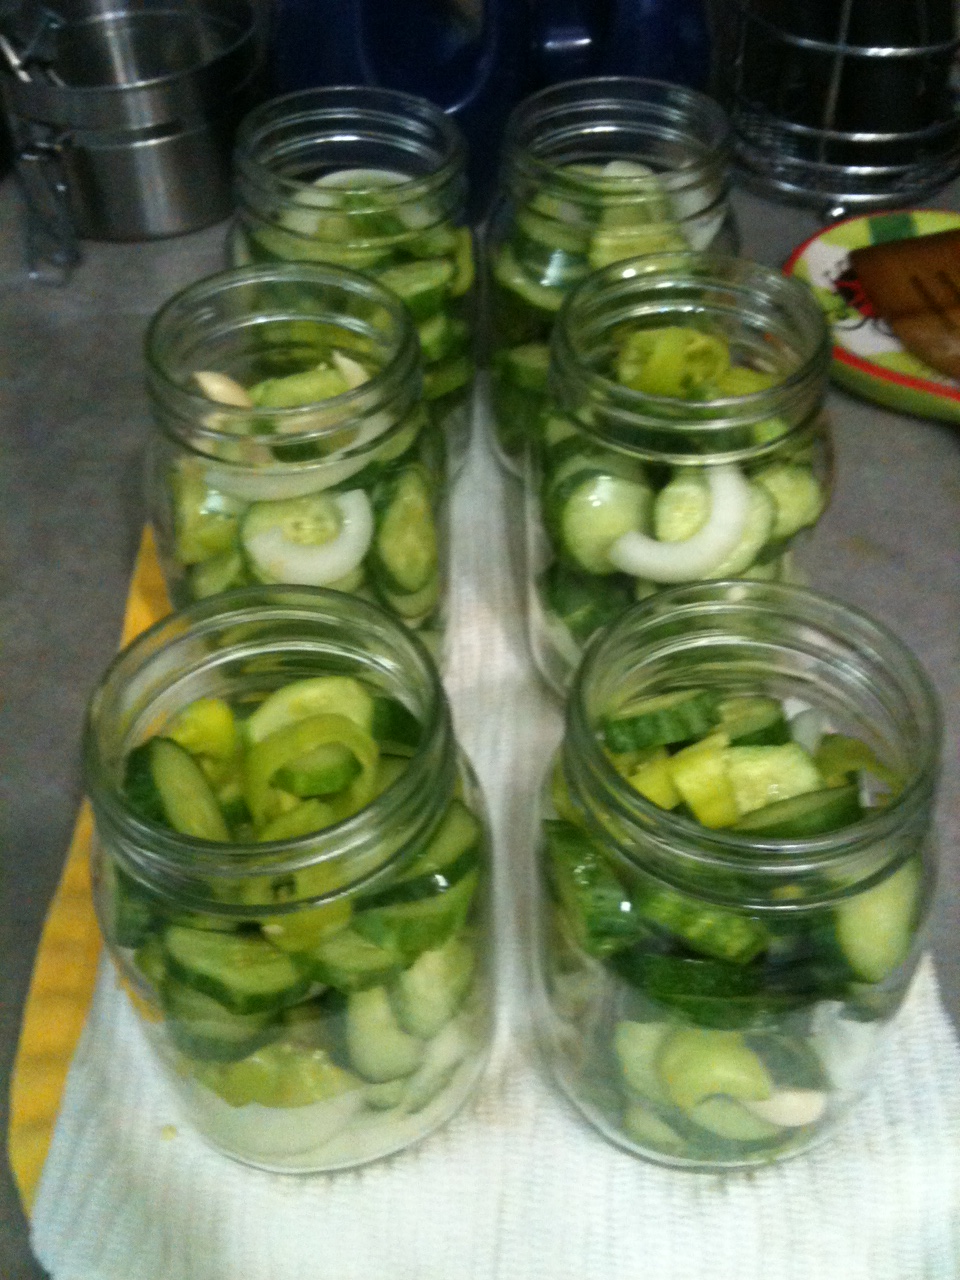
I decided to pickle cucumbers, banana peppers and onions.


You can either buy a pickling season mix, or create your own using pickling salt, mustard seed, coriander seed, cloves, all spice and other spices - it's really up to your own taste preference.

You combine the seasoning mix with vinegar and water and simmer.


Warning - This is very strong smelling, make sure you open a window or ventilate or your house will smell for days.

Once it's simmering you just pour it over the cucumbers in the jars. I used a ladle and the mess was minimal.


I used Ball Jars with lids and bands (same you would use for making jams.) Then you refrigerate for 24 hours.  Because you are putting a hot liquid straight into the cold, the jars seal themselves.

I was so excited that the pickles turned out crisp and flavorful! We ate a whole jar (1 pint) in just 2 days!


I'm ready to make more and share with friends!


Thursday, May 10, 2012

Butterfly in the Sky...

A few years ago, my aunt planted a Butterfly garden at my grandparents house. She ordered some caterpillars and in a few months they had hundreds of butterflies! 


It was really neat to watch the caterpillars triple in size, make cocoons and then turn into beautiful Monarch butterflies. Since then I've wanted to have my own butterfly garden.

We started planning for the garden a few weeks go.  I already had a Butterfly Bush, so I wanted to make that the focus of the garden.

Butterfly Bush

I added Salvia and Hibiscus to the garden, plants that butterflies like to drink nectar from.

Salvia
Hibiscus

I finally found Milk Weed (or Butterfly Weed) at Lowes this past weekend.  This is essential for any Butterfly garden.  The caterpillars eat the leaves and the Butterflies drink the nectar from the flowers and lay their eggs here.
Milk Weed

We finished it off with some mulch and cute white fencing to keep Lola out.


Now I just need to order some caterpillars!

Monday, May 7, 2012

My Chocolate Chip Cookie Recipe

Since I've been trying to find the best chocolate chip cookie recipe I've baked 1,000s of cookies. For a while Michael was so tired of trying cookies that he forbid me from baking!

I've finally found a recipe that I enjoy, it makes chewy, thick cookies.  Whether you like crisp cookies or chewy cookies or cakey cookies, I'll share some tips I've learned that help you end up with the best cookies.

Yield: 2 dozen cookies
11 1/2 ounces Chocolate Chips - I use half semi sweet and half milk and you must must use the Ghirardelli Chocolate Chips
1 cup butter (2 Sticks), softened - Do not melt this, only soften for like 30 mins before you start
3/4 cup sugar
3/4 cup brown sugar, packed - I've used light or dark there isn't too much difference
2 large eggs
2 teaspoons vanilla
2 1/4 cups unsifted flour
1 teaspoon baking soda
1/2 teaspoon salt


Mix Butter with both sugars, I do this in my stand mixer so they get creamed together. Add eggs one at a time and vanilla. Mix on low until blended.

In another bowl mix flour, baking soda and salt. Then slowly add this to the mixer. Once combined add chips and mix with a spoon. 


I use a rounded tablespoon for each cookie, try to keep them in a ball shape, this makes prettier cookies when they are done. I can usually fit about 6 per sheet. (I think I make my cookies larger than most, because the original recipe says 4 dozen, but I usually get about 2.5 dozen.) 

*If your dough is to loose to form balls, which happens a lot here with this humidity, you can refrigerate the dough for 30+ minutes and it is much easier to handle. You can also freeze the dough to bake at a later date.


Bake at 375° for 9 minutes. Be careful not to over cook! (Remember that the cookies will still continue to cook while resting on the baking sheet)  

Remove from oven and let the baking sheet rest on a cooling rack for 2 minutes, then use a spatula to remove the cookies and allow them to rest on cooling racks for a few minutes.


I've made these with Splenda as well, and they come out nearly the same.  I've also tried to make them with apple sauce or butter substitute to lower the fat/calories, but those cookies didn't not turn out to taste the same (in my opinion). 

I enjoy my cookies a day after baking, they get a delicious chewy texture!


Friday, April 6, 2012

Our Summer Garden

We have finally planted everything in our summer garden!  It's twice the size of last years, so we are trying some new plants!


This summer we are growing two types of tomatoes, cucumber, zucchini, bell peppers, Cajun bell peppers, banana peppers, Anaheim peppers and green beans!

I planted the green beans from seeds about 3 weeks ago and look how much they have grown! 


I can't wait to see how our garden grows this summer!

Monday, April 2, 2012

Under Our Umbrella

After enjoying our new deck, we quickly realized we would need something to provide shade.  We purchased a 9 ft Market umbrella from Academy, it was a great deal for only $35.  It opens easily with a crank and even tilts!  But you can't have an umbrella without a stand.  The stands are $30, so I couldn't see spending that much for a pretty weight.  We decided to make our own!

We got an 18'' planter and filled it with a 60lb bag of cement.  We had left over 1 1/2'' PVC pipe from a plumbing project, which we inserted into the wet concrete.


After that set for 24 hours, we spray painted the PVC, added gravel on top of the cement and 4 little planters.


Much prettier than a weight, right?  And it cost less than $20.