Thursday, June 15, 2017

Old Window Transformation

When we purchased our fixer upper 7 years ago, we replaced all the old wooden windows with new vinyl single-hung windows. Most of the old windows had broken glass, but kept one that was still in good condition for a craft project.

I had originally painted the window blue and then it sat in the garage for years. When I finally got around to looking at it, I hated the blue. I decided this would be a good project to try chalk paint on, so I purchased some porcelain white chalk paint from Michaels.


I had never used chalk paint before, but I love the matte finish it creates. I had to re-sand the window to help remove the blue paint, and then I painted 3 coats of the white chalk paint. After letting the last coat dry for 24 hours, I sealed the chalk paint with clear wax. You simply brush on the wax, wait a few minutes then buff off with a cotton rag, it couldn't be easier.

I searched on Pinterest for old window projects and found one that someone added a shelf to. I loved the idea of more space to display decor, so we cut a shelf  and some brackets and I painted those white.


Since the glass was so old (probably over 50 years), it wasn't clear and that bothered me, so I decided to paint the glass with chalkboard paint.


I painted 3 coats of chalkboard paint, and sanded before the final coat and this resulted in a smooth surface. Make sure to prime the chalkboard with chalk before using.

To dress up the window we cut 4 mullions to create the look of a 6 panel window. I used hot glue to adhere them to the window.


I am in LOVE with the final result. I added some vintage estate sale finds, cotton garland and my Nora Fleming Bud Vase, and viola!


Thursday, March 6, 2014

'Be Our Guest' Room Update

Since our family went to Disney World, I've been wanting to update my Guest Room with some new Disney Shwag. (Here is what the 'Be Our Guest' Room looked like originally.)

When we booked our vacation, I ordered the Free Custom Park Maps. When I saw how nice they were I decided to use them as art!

The maps are very large (around 14" x 20") and I couldn't find a frame that size, so I purchased an 18" x 24" and mat board.

I cut the mat board to fit the frame and put the map on top. I tried cutting the mat to put the map behind, but I didn't like how it covered some of the map design.


Here is the framed map! The maps are folded, so they do have creases but they aren't very noticeable. Also, the parks are printed on both sides, so if you wanted to frame all 4 you would need to order 2 sets. So far I have only framed the Disney World Map.

Since going to Disney World, I have 2 new collections. We got hooked on Vinylmation! I needed some shelves to display my collection on so we built corner shelves just like these picture frame shelves.


I also started collecting the Disney Shoe Ornaments! These are adorable!


If I'm not careful I will run out of space and there will be no room for guests in the Be Our Guest Room!

Monday, September 9, 2013

Under Cabinet Magnetic Spice Rack

We have been looking for a spice rack solution for our kitchen. Our spices are in a cabinet on the opposite side of the kitchen as our stove, and it's above the sink - Not Convenient at all! We looked at different magnetic racks, but none had the quality we were looking for, nor did we have any wall space. I decided to make my own magnetic jars and we decided to have them magnetize to the under side of our top cabinets!

First, we used some left over sheet metal to create a surface for the magnets to stick to. We used construction adhesive to glue the metal to the under side of the cabinets. We used clamps to hold it in place while it dried.


Another option for a magnetic surface is using an old cookie sheet or painting the surface with magnetic paint.

I found some small canning jars at Hobby Lobby to store the spices in. We glued a super strong magnet to the lid of each jar. I found the super strong magnets at Home Depot.


I purchased some vinyl chalkboard labels so we could write what spices were in each jar, that way we could reuse the labels if we changed the spices.


Once all the jars are assembled and filled with spices all we had to do was stick the jars up!


I love how the spices look! They are super convenient and take up no counter top space! We can easily fit more jars so we will be adding some as soon as Hobby Lobby gets more in! 


Monday, November 5, 2012

Door Decor


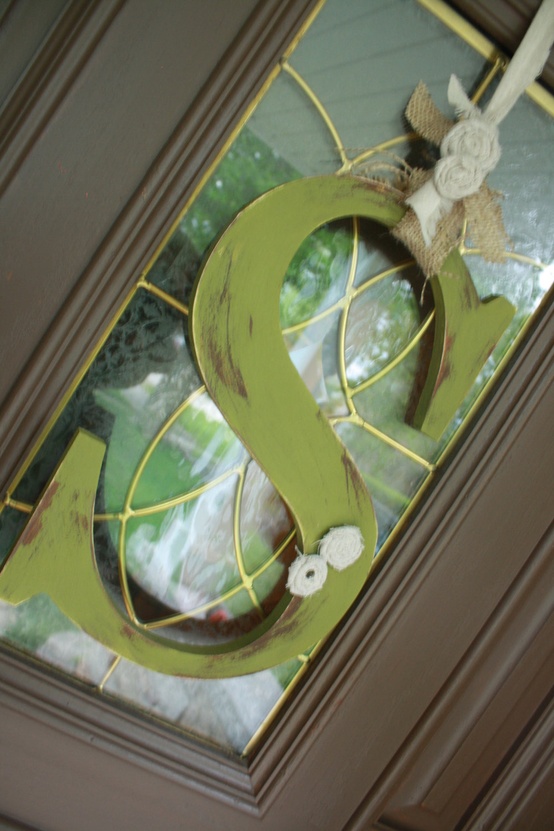
A few months ago I stumbled upon this Door Initial idea on Pinterest - Door Initial Monogram Shabby Chic. I thought it was super cute, but I could easily make it for much less than $50.  

We started by choosing a font and making a template for the letter. Then we cut the letters out of plywood.


I painted a base coat of a dark brown.  Then I layered a barn red over it.  It look a few layers and mixes to achieve the antique look I was going for.  I found the best way was to paint the red and then use my fingers to blend in some browns for accent.

I picked up some fabric flowers, lace ribbon and wheat at my craft store to decorate the letters.

Here is my letter S and the inspiration Letter S.


I am pleased with how mine turned out (definitively shabby-chic), and it cost much less than $10.  
My door S is hanging in my kitchen now, since I have my fall wreath on my front door.


Friday, October 12, 2012

Halloween Lanterns

I love Fall!  As soon as the weather gets cool, I am ready to decorate!

While looking at Pinterest to find ways to use my extra canning jars, I found this neat idea to make Halloween Lanterns. It also gave me a chance to cut vinyl with my Cricut.

I found a great site to order vinyl from - Expressions Vinyl.  They also have videos on how to "weed" and transfer vinyl so it was perfect for a beginner.

I used Martha Stewart's new glass paints to paint my 3 jars.  I baked them in the oven to set the paint.


I began by creating my Halloween design in Cricut Craft Room and cutting them out of Black Outdoor Vinyl.


I used transfer tape to apply the deigns to my jars -  This was so easy!


After removing the transfer tape, I had 3 beautiful Halloween Lanterns!


I used battery tea lights inside the jars so I could leave the lids on.  I may make handles to hang them on my porch for Halloween night!

Monday, April 2, 2012

Under Our Umbrella

After enjoying our new deck, we quickly realized we would need something to provide shade.  We purchased a 9 ft Market umbrella from Academy, it was a great deal for only $35.  It opens easily with a crank and even tilts!  But you can't have an umbrella without a stand.  The stands are $30, so I couldn't see spending that much for a pretty weight.  We decided to make our own!

We got an 18'' planter and filled it with a 60lb bag of cement.  We had left over 1 1/2'' PVC pipe from a plumbing project, which we inserted into the wet concrete.


After that set for 24 hours, we spray painted the PVC, added gravel on top of the cement and 4 little planters.


Much prettier than a weight, right?  And it cost less than $20.


Monday, March 26, 2012

Easy Chair Makeover

This weekend we decided to clean out our garage.  Among far to much other junk, we found these old white patio chairs.  These had been left at my brother's old house, then passed on to me when he moved.  They are old, dirty and stained and were just hidden away in my garage.


I was just about to throw them out (or pass them along to someone else) when Michael suggested we try to paint them.  I figured we didn't have anything to lose. We picked up 2 cans of Rustoleum for about $3.50 each.  And this is what the chairs look like now:


Three BEAUTIFUL chairs that look brand new!  They are shiny and can be easily wiped clean.  These will be perfect extra chairs for when we have guests over!


 What a great 10 minute makeover for these patio chairs!


Wednesday, February 1, 2012

Valentine's Day Door Decor

I stumbled across this neat Valentine's Day Door Decor post on Pinterest last week. I decided to give it a try and make my own!

I purchased Styrofoam shapes (you can find these in the floral department of craft stores). The 'O' was easy because they have different sized Styrofoam wreaths.  I had to create the 'X' by cutting two rectangles of Styrofoam and gluing them together. I painted the 'X' and 'O' with red craft paint just so they would blend in with the flowers.

While I really liked the rustic look of using pink and red berries for this, I wasn't able to find any in my local craft stores.  I decided to use pink and red roses with white carnations instead.  Since these flowers had metal stems I was able to cut them and just push them into the styrofoam.  I used hot glue where needed to make sure nothing would fall off.


Here's a side by side comparison.  What do you think?

Ordering the Kisses and Hugs Berry Wreath from Etsy would have been $75 plus $17 shipping.  I made mine for less than $30.

Happy Valentine's Day!